Installing WSL
-
Enable virtualization in Windows
- Open the BIOS of your machine and enable virtualization. This will look a bit different for everyone, but there should be an option hidden in the BIOS somewhere to enable virtualization.
- Open the Turn Windows Features on or off menu
- Check the “Virtual Machine Platform” box
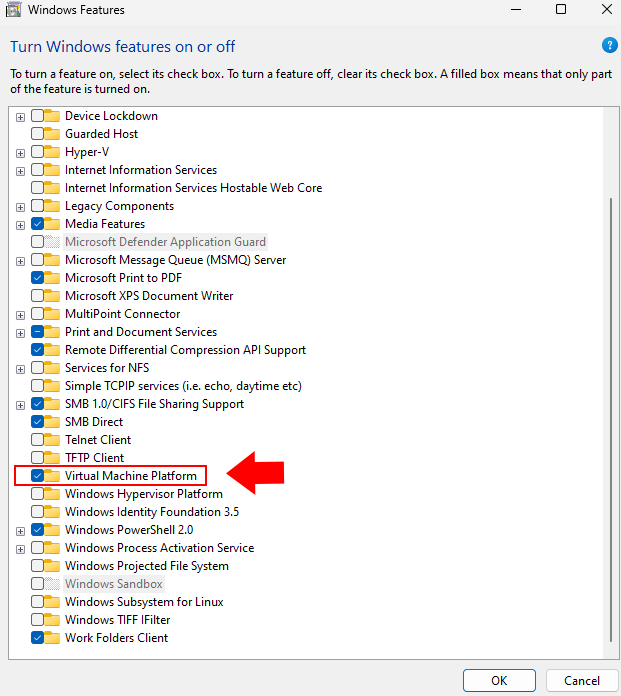
- Check the “Virtual Machine Platform” box
-
Install all the relevant components in WSL
-
Type
wsl --install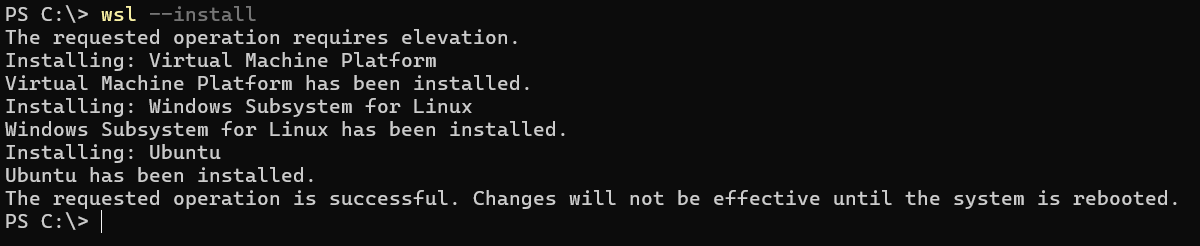
-
In Powershell or Terminal on Windows, type in
wsl --version -
You should be able to see that everything is installed correctly
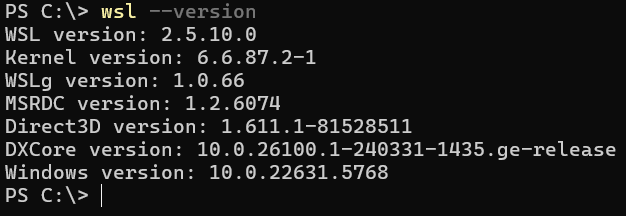
-
After opening a WSL instance in Powershell/Terminal, install needed packages for our class using:
sudo apt update && sudo apt upgradeTHENsudo apt install gcc clang build-essential gdb git valgrind zip rsync
-
Visual Studio
- Check the “Linux and embedded development with C++” box in the VS Installer
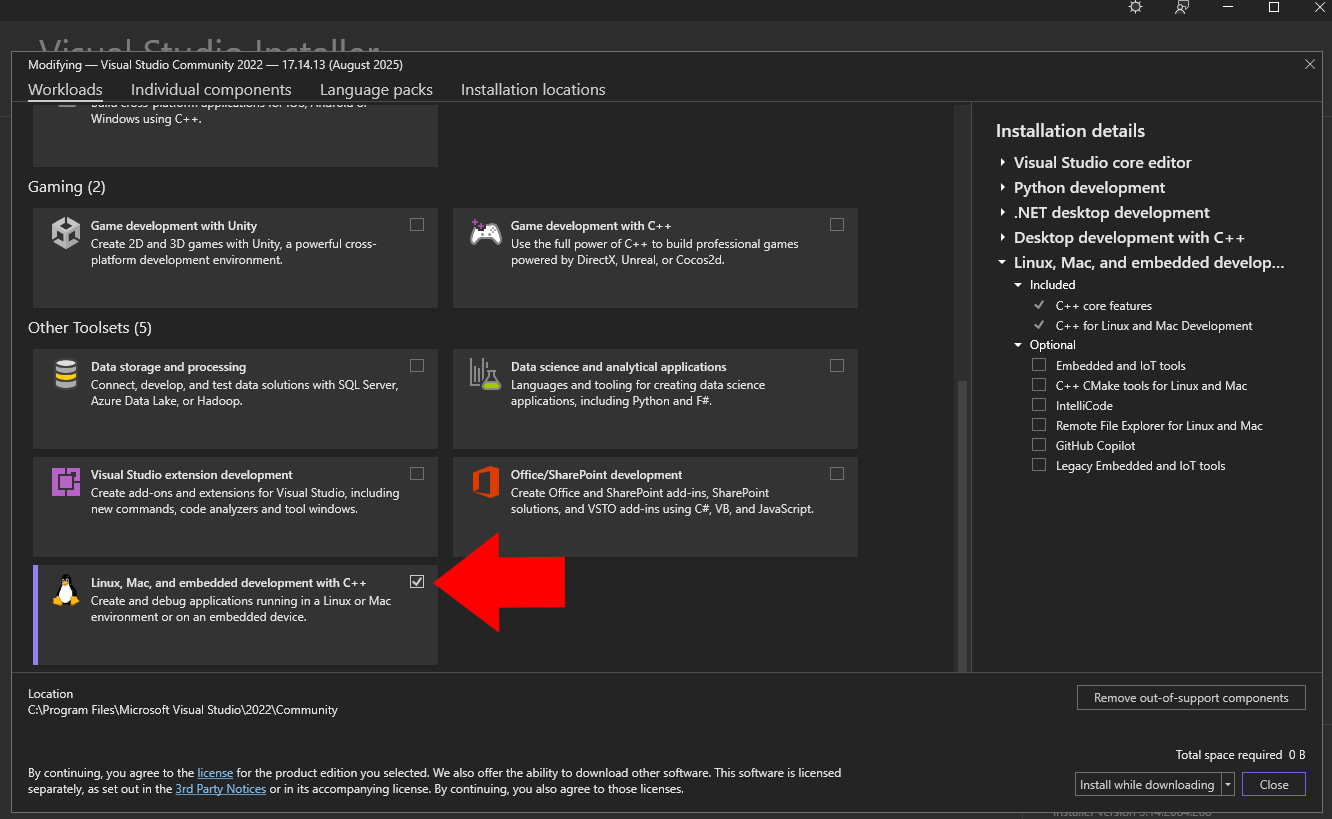
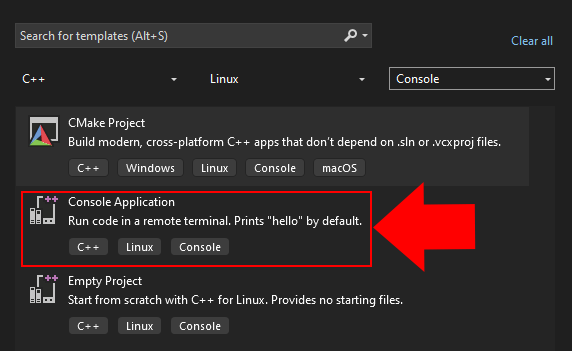
- When creating a new VS project, use the following filters and choose the correct Console Application project
Note!
You may need to change your starter file from a .cpp file to a .c file, and include stdio.h rather than cstdio.
- Go to the Project properties and ensure the platform is set to Active(x64), and under General, for the Platform Toolset option, choose **WSL2 Clang Toolset
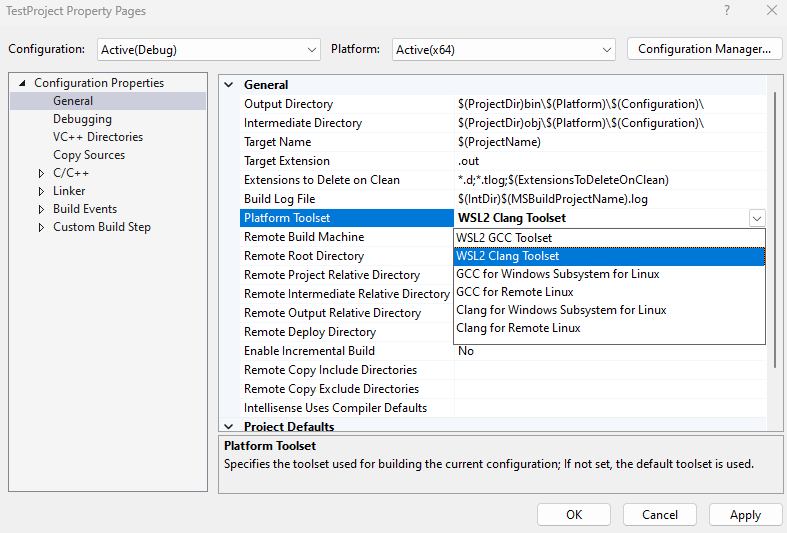
You should now be ready to compile using WSL2 and Clang/GCC in Visual Studio!